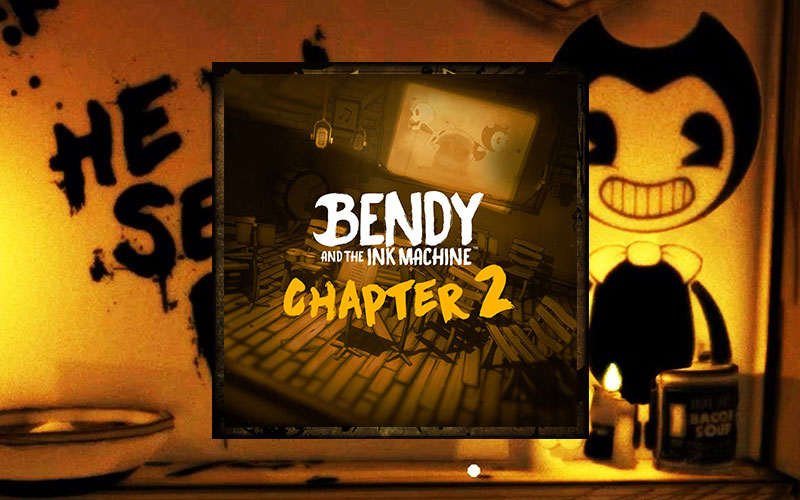
Chapter 2: The Old Song – Walk-through & Strategies
Chapter 2: The Old Song, better known as Chapter Two, is the second chapter for Bendy and the Ink Machine. It was released on April 18, 2017 from Game Jolt once and the Steam store on April 27th, 2017, $5.99 USD. Continuing the story settled in Chapter 1: Moving Pictures, help Henry to exit the basement he fell into, later revealed to be the Music Department, solving new puzzles, finding new characters, avoiding inky creatures known as Searchers, as well as “Bendy” in the process.
The first remastered edition for Chapter 2 was released on September 28, 2017 upon Chapter 3’s release, and the second remastered update was released on April 30, 2018 upon Chapter 4’s release.
Summary
There’s only one thing to do: Find a new way out.
In Chapter Two, dive deeper into the animation studio and learn the secrets that it holds.
Fight your way through and don’t ever look back.
There is something in the darkness.
Strategy
The chapter starts with Henry waking up in the pentagram room (after he fainted, as seen back from the previous chapter). Then, grab the axe that is next to Henry to unlock the next objective.
“Find a New Exit”
Using the axe, break the wood blocking the door on the left side of the room, and walk through it. Then go downstairs until you reach the Utility Shaft 9 entrance. There Henry will see the quote “HE WILL SET US FREE” written on the wall (presumably by Sammy Lawrence) next to a Bendy cardboard, cans of Bacon Soup, candles and a banjo. Explore the room until Henry finds a tape recorded by Sammy, in which he talks about Bendy as if he was a god, and that he will save him. At the end of the tape, he asks: “Can I get an amen?”, and just when the tape ends, Sammy’s voice echoes: “I said, can I get an amen?”.
Then head to the ink flooded hall, where Henry can hardly walk, and get through it. There, Henry will see a person passing through carrying a Bendy cardboard cutout, and just when Henry reaches him to ask him for help, he´s gone, leaving the cardboard behind. Move to the right corner of the room to unlock the next objective.
“Redirect Power to the Gate”
There, Henry will find a closed gate, and you will have to find 3 switches around the place. The first one is next to the “Train Troubles” poster, the second is to the right of the second pentagram, and the last one is hidden behind several Bacon Soup cans on the shelf. These cans are located in the left corner of the room, at the base of a destroyed shelf next to the Bendy cardboard. After they are all found, return to the gate. This will unlock the next objective.
“Raise the Gate”
At the gate, hit the lever next to it to activate it. The gate will open, and a new objective materializes in the corner.
“Find a New Exit”
Once Henry enters the gate, break the wood blocking the entrance to the Music Department. There, Henry will find another tape recorded by Sammy Lawrence, telling Henry that the Ink Machine started to leak, and that Joey Drew installed a pump to drain it periodically, and that the switch to activate that pump is in Sammy’s office. Then head to the flooded stairwell to unlock the next objective.
“Drain the Stairwell”
Next to Henry, attached to the wall, there is a “Power” switch, which Henry has to turn. This will cause the energy to return to the Music Department room, but it will also cause a bunch of Searchers to attack, trying to kill Henry. Hitting them with the axe once will kill them, though. Surviving the attack will activate a gate at the right side of the room, and a “Recording” letter will light up. Entering through this gate will lead Henry to Sammy’s Office, which entrance is also flooded by ink, with a locked closet at the right side of the room. There is a tape recorded by Wally Franks in front of the office. Listening to it will lead Henry to the next objective.
“Unlock Wally’s Closet”
In the tape, Wally will state that he lost his keys and that they may be at one of the garbage cans located all around the place. Doing so may lead you to the recording studio, which features a bunch of chairs, an ecram, microphones hanging from the roof, a recording booth, a tape recorded by Susie Campbell, a banjo, a drum, a bass, a violin and a piano downstairs, and a projecting booth, a projector, and a tape recorded by Norman Polk upstairs.
The tape recorded by Susie tells you that she loves working for Joey and that she really feels a connection with Alice Angel (the character she voices). The one recorded by Norman gives Henry a great hint: It tells Henry that everyday, while the band was recording the songs, Sammy shut down everything and told everyone to wait outside. Then he turned on the projector and ran downstairs to play some instruments. After a long time, he told everyone to return to their activities. Turning on the projector and playing the instruments will not have any effect on the game until the next objective is unlocked. Eventually, Henry will find the keys and, with them, return to Wally’s closet and unlock it.
“Find Sammy’s Sanctuary”
Inside the closet, there are some cans of Bacon Soup and a tape recorded by Sammy. In it, he reveals that he has a sanctuary, just like Joey does, and to enter Henry needs to learn his “favorite song”: The song is always a random combination of the five instruments located in the Recording Studio.
Then, Henry has to go to the projection booth and turn on the projector, then run downstairs and play the combination before the projector turns off. Successfully doing it will open the gate to Sammy’s sanctuary, leading him to the next objective.
“Enter the sanctuary”
Now Henry will have to enter the sanctuary and activate the valve at the bottom of the hall. This will unlock the next objective.
“Find the Second Valve”
After activating the valve on the sanctuary Henry must exit the hall and head to the Infirmary. This will trigger a jumpscare attempt of a Bendy cardboard (Just like what happened during Chapter 1) and several Searchers will try to attack, while a mysterious masked person, who is later revealed to be Sammy, watches Henry from upstairs. After surviving the attack of the Searchers, Henry must go to the infirmary that was blocked by ink before and find the second valve. But when Henry get to the pipe where the valve should be, Henry notices that the valve was gone. Then Henry must pull down the “utility access” lever and go down the flooded sewers. Then Henry wades through the ink coming from an open pipe, and encountering Swollen Jack, whose holding the valve. Once Henry approaches him, he ducks back down into the ink. After walking through the ink further and listening to the recording by Jack Fain, Henry enters a room where Swollen Jack is currently there, a small lift with a crate on it, and two cylinder shaped machines with levers attached to them. Henry then must push the “up” lever on the left machine, which raises the lift, then Henry must walk towards Swollen Jack until he appears under the lift. Then Henry must push the “down” lever on the right machine, which drops the lift on top of Swollen Jack, killing him. Then Henry must pick up the valve, take it back to the pipe, place it on the pipe, and turn it.
“Return to Sammy’s Office”
After activating the second valve, Henry needs to go back to Sammy’s Office and open the door that was blocked with ink and one leak of ink coming from a pipe. Then after opening the door of the office, Henry must activate the pump control.
“Take the Stairs”
Now exit the office and go to the stairwell to exit the place. Attempting to do so will result with Sammy knocking Henry out, and when he wakes up, he’s tied to a wooden beam and Sammy starts to talk to him, telling him that he intends to summon “Bendy” and that he will offer him as a sacrifice, so he can be freed from his ink body. Sammy then exits the room and starts to sing a song about sheep through some speakers. He then summons “Bendy” and orders him to accept the sacrifice, but “Bendy” ends up “murdering” Sammy. This will lead Henry to the next objective.
“Escape Bendy”
Henry then unties himself, and Henry has to grab the axe to kill the Searchers that will appear. Then, enter the hall in front of Henry and break the wood boards blocking the way. Breaking the last wood board will cause the axe to break, and then Henry has to enter a room completely flooded by ink. Entering will cause “Bendy” to appear from the pond and he will start to chase Henry. Henry has to take the path to the right (the path Henry came from is now blocked by debris) and go through, where the Corridor Maze is, keep on running away as quick as possible in a straight pass and head right, left, right, left, left and right, the door at the end of the hall. The door will block itself after successfully escape from “Bendy”. The room will be filled with Bendy dolls and a couple of machines attached to the wall. Entering the door in front of Henry will cause a Bacon Soup can to roll out. Henry then will ask who’s there, and Boris will come out of the corner, revealing that he’s alive. Henry will be surprised about it, and this ends the chapter.
Unleashing the Jungle: A Guide to Gorilla Tag Mods and Installation
Gorilla Tag Mods bring a new dimension to the already thrilling Gorilla Tag experience. Th…


